WELCOME TO Tapture Studio | Starting Services at ₹299
WELCOME TO Tapture Studio | Starting Services at ₹299
Meeting in our office is free | Meeting at your office ₹3000 Charges | Available on Saturday and Sunday for Meetings

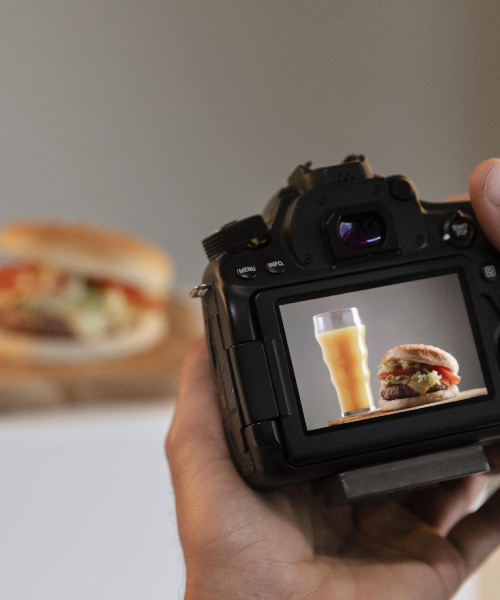
Lighting is one of the most critical elements in product photography. Whether you’re an eCommerce seller, a commercial photographer, or a hobbyist, the right lighting can make or break the quality of your images. Poor lighting can cast harsh shadows, distort colors, or make your products look unappealing. On the other hand, proper lighting can highlight details, create mood, and deliver crisp, professional-looking photos that catch the viewer’s eye.
In this post, we’ll walk you through how to choose the right lighting for product photography to ensure your photos are as striking as your products.
When it comes to product photography, you primarily have three lighting options: natural light, continuous artificial light, and strobe lighting.
Natural Light: This is the easiest and most cost-effective lighting option. It’s the light from the sun, and depending on the time of day and location, it can be soft or harsh. Natural light is ideal for small, simple setups and can work well for products with a matte or textured finish. However, the biggest downside is that it’s uncontrollable and unreliable, as it changes based on the weather, time of day, and other environmental factors.
Continuous Artificial Light: Continuous lights are great for beginners. These lights stay on constantly, allowing you to see how the light will affect your product in real-time. Types of continuous lighting include LED lights, fluorescent lights, and tungsten lights. LED lights are often the best choice due to their low heat output and energy efficiency. They also come in adjustable color temperatures, making them versatile for different product types.
Strobe Lighting: Strobe lights, also known as flash photography lighting, are typically used by professionals. They produce a powerful, short burst of light that freezes the motion and gives sharp, high-contrast results. Strobe lighting allows for greater control and can be shaped with softboxes, umbrellas, and reflectors. However, they are more expensive and require additional equipment like triggers and light modifiers.
The type of product you are photographing plays a significant role in the lighting setup you choose. Here’s how:
Small, Glossy Products (Jewelry, Electronics, etc.): Products like jewelry or electronics often benefit from soft, diffused light. Harsh lighting can create unwanted reflections or glares on shiny surfaces. To prevent this, use softboxes or diffusers to scatter the light and soften shadows. A combination of natural light or continuous LED lighting is ideal for capturing fine details while minimizing reflections.
Clothing and Textiles: Fabrics need a bit more attention to texture and drape. Soft, diffuse lighting is your best friend here. Using continuous lights with softboxes or umbrellas helps reduce harsh shadows and creates a flattering, even light on the material. When shooting clothing on models, consider using a two-light setup—one for the subject and another for background separation.
Large Products (Furniture, Appliances, etc.): For larger products, you will likely need more powerful lighting, such as strobe lights or high-powered LED lights. You’ll want to light both the product’s details and its environment. A combination of main lights to highlight the product and fill lights to soften shadows works well for big items.
Once you’ve chosen the right type of lighting, it’s essential to understand the techniques to get the best result. Here are a few lighting setups commonly used in product photography:
One Light Setup: A simple, budget-friendly setup for small products. Place a single light source at an angle to the product to create shadows and highlight its contours. Use a softbox or diffuser to soften the light.
Two Light Setup: This is great for balancing the light and reducing harsh shadows. One light is used as the main light (key light), and the other serves as the fill light to fill in shadows. This setup works well for most products.
Three Light Setup: This is a more advanced setup, often used in studio environments. It involves three lights: a key light, a fill light, and a back light. The back light, sometimes called a hair light, creates separation between the product and the background, giving the shot a more three-dimensional feel.
Color temperature refers to the warmth or coolness of the light. It’s measured in Kelvin (K). For product photography, it’s crucial to use lights that match the white balance of the scene to avoid color distortion.
Daylight (5000K-6500K): This range of color temperature is ideal for most product photography since it mimics natural daylight. It produces a neutral color balance and highlights true colors.
Tungsten (3200K): Tungsten lights give off a warm, yellowish hue. While they can be useful for certain moods, they’re often not ideal for product photography unless you’re shooting items like food that need warmer tones.
Fluorescent (4000K-5000K): Fluorescent lights produce a cool tone that can make the images look too green. However, they’re energy-efficient and are sometimes used in product photography with the correct white balance adjustments.
Light modifiers are essential tools that shape the light, control reflections, and soften shadows. Some popular modifiers include:
Softboxes: These create soft, even light, perfect for eliminating harsh shadows and providing a flattering light on products.
Umbrellas: Umbrellas are great for diffusing light, providing a broad, soft illumination that’s especially useful for larger products or portraits.
Reflectors: Reflectors bounce light back onto the product, helping to fill in shadows and brighten up darker areas. They’re often used in conjunction with a main light source.
Product photography is all about precision, but it’s also an art. Once you’ve set up your lighting, take test shots and experiment. Adjust the intensity, position, and angle of the lights to get the best results. Don’t forget to check for any unwanted reflections or hotspots, especially on shiny or reflective products.
Lighting is one of the most crucial elements of successful product photography. By understanding your lighting options, experimenting with different setups, and using the right tools, you can create photos that make your products shine. Whether you opt for natural light, continuous lights, or strobes, always keep in mind the goal of showcasing your product in the best possible way. With practice, you’ll be able to master the art of product photography lighting and produce high-quality images that grab attention and boost sales.
Share your shoot requirements and product details with us. Ship or deliver your products to our Delhi studio. Our professional photographers handle the shoot. Review previews, approve, pay, and download high-resolution images.
You ship the product, we create the visuals. Send your requirements and references via WhatsApp or email. Products are photographed in our Delhi studio. Review watermarked images, approve, pay, and receive final files.
Tell us about your product and shoot needs. Courier or drop products at our Delhi studio after confirmation. Our experts shoot professionally. Review images, complete payment, and download high-resolution photos.
Send your product to our studio and let us handle the rest. We shoot in a professional setup. Review sample images, approve the work, make payment, and receive final high-quality images digitally.